Choose your language
Using the board effectively
Host: The board. It is the one piece of teaching technology nearly every classroom has. No power needed. No internet. Just a surface, and something to write with.
But here is the question. Are you really using it well?
Think about your last lesson. What did you write? Where did you write it? Could every student see it? How long did students spend copying instead of learning? Did the board help your lesson — or just fill the time?
The board is powerful. But only if you plan how to use it.
Q2: Which of these problems with the board do you have? (Tick all that match.)
You are not alone. These problems are very common — many teachers around the world have the same ones. The good news: each problem has a simple answer.
- Small writing — Stand at the back row before the lesson. If you can read it from there, every student can.
- Messy board — Divide the board into clear zones. Clean each zone only when you need to.
- Facing the board — Write quickly, step back, and turn to face the class. The board does not need you standing in front of it.
- Too much copying — Ask: do students need this in their books? If yes, give time. If no, do not write it.
- No planning — Spend two minutes before the lesson thinking: what will go where on the board?
- Sightlines — Walk around the room. Where can students not see well? Move them, or move what you write.
You will work on all of these in the rest of the lesson.
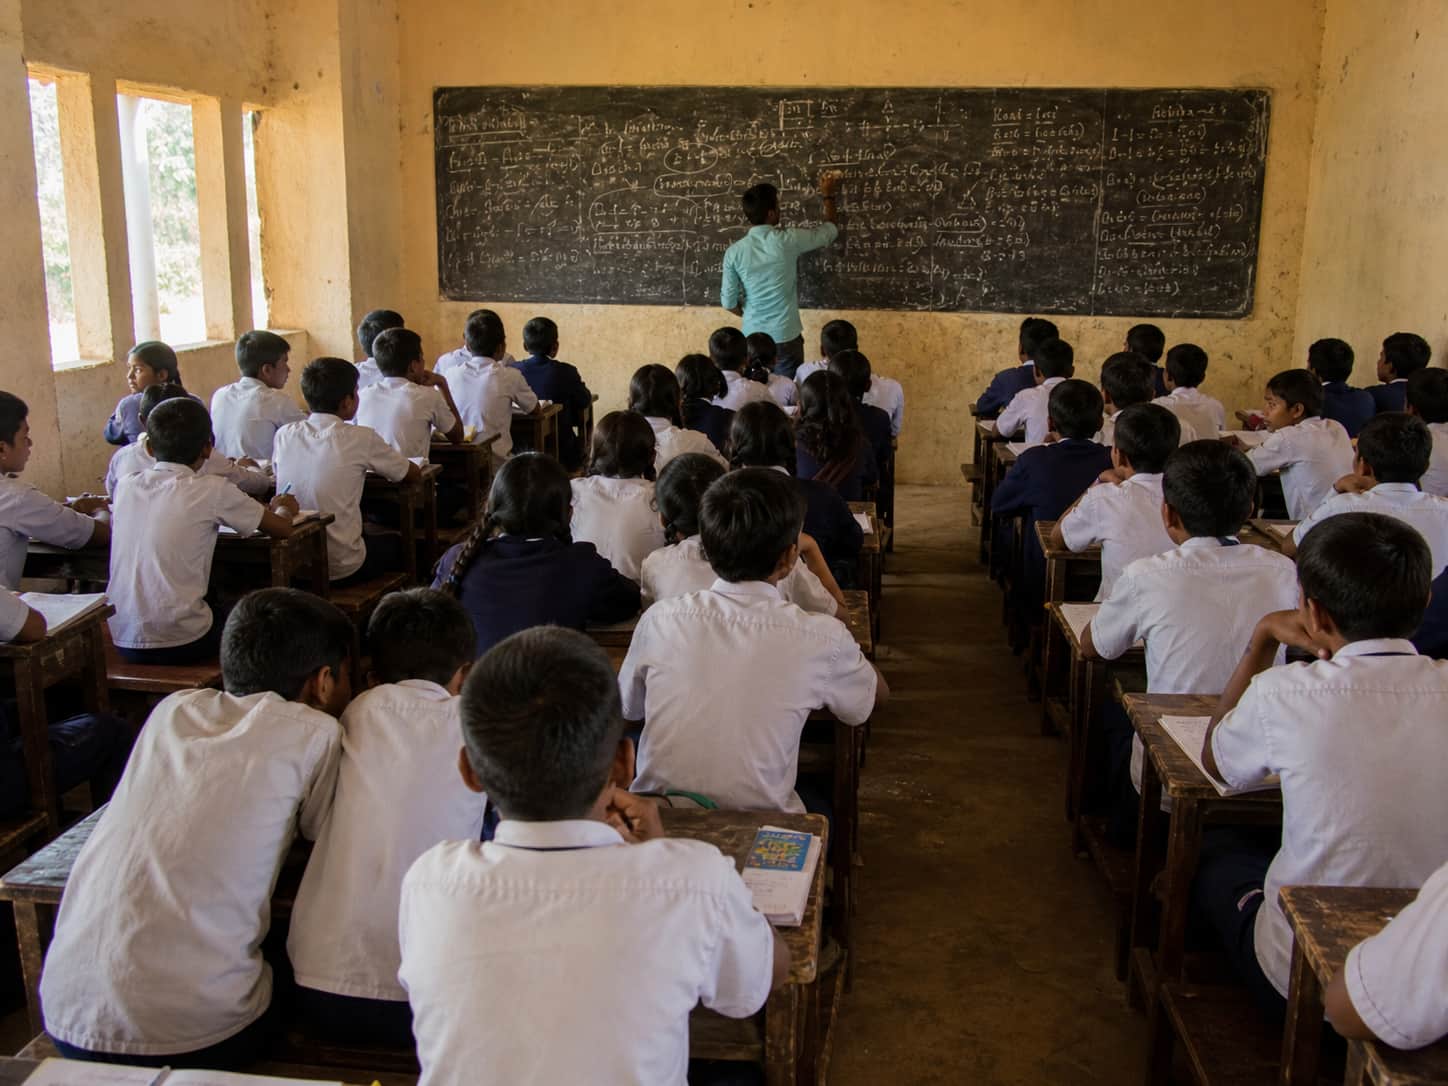
The scenario: Mrs Adesina teaches a class of 54 students. The room has fixed wooden desks in rows. The classroom is long and narrow. There is a chalkboard at the front.
Today she is teaching about the water cycle. She stands at the board with her back to the class. She writes the title at the top. Then she writes new words on the right. Then she draws a small picture in the middle. Then she remembers a question and writes it on the left.
By the end of the lesson, the board is full. Students at the back row cannot read most of it. Three students copy the wrong words into their books. Two more give up and just stare out of the window. Mrs Adesina has been talking and writing for thirty minutes — but she has not looked at her class once.
Think about: writing size, board layout, where the teacher is standing, and what the students are experiencing.
The scenario shows several common problems all at once:
- No board plan. Mrs Adesina is writing things in random places as she thinks of them. There is no system. The board becomes confusing very fast.
- No contact with the class. She has her back to her students for most of the lesson. She cannot see if they are following, confused, or distracted.
- Sightlines are bad. A long, narrow room with 54 students means many students are too far away to see clearly. Small writing makes this worse.
- Students are passive. They are not learning — they are watching someone else work. Some are copying. Some have given up.
The problem is not Mrs Adesina — it is that no one has shown her how to plan and use the board well. That is what this lesson is about.
There is no single right answer — pick the change you think would have the biggest effect.
Think about each strategy and write what you would actually do in your own classroom.
| Teaching Strategy | Your ideas |
|---|---|
| Plan the board before the lesson | |
| Divide the board into clear zones | |
| Write big enough for the back row | |
| Step back and face the class | |
| Use the board for student work too | |
| Use simple drawings, not just words |
Each of these is a small change. Together they make a big difference.
| Teaching Strategy | Action |
|---|---|
| Plan the board before the lesson | Spend 2 minutes thinking: what will go where? Draw it on a piece of paper if it helps |
| Divide the board into clear zones | Try three zones: new words on the left, main lesson in the middle, examples on the right |
| Write big enough for the back row | Stand at the back of your empty classroom and check — if you cannot read it, no student can |
| Step back and face the class | Write a few words, then turn around. Watch your students. The board can wait |
| Use the board for student work too | Send confident students up to write answers. It builds confidence and saves your time |
| Use simple drawings, not just words | A simple stick figure or arrow often teaches more than five sentences. You do not need to be an artist |
Q6. Watch the video below of three teachers talking about how they changed the way they use the board.
Host: Three teachers share how they changed the way they use the board.
Teacher 1: My handwriting was very small. Students at the back of the class could not read it. They stopped paying attention.
Teacher 2: I wrote everything everywhere. New words on top of old ones. The board was a mess. Students copied the wrong things.
Teacher 3: I talked to the board, not the class. My back was always turned. I missed half of what was happening behind me.
Teacher 1: Now I write bigger — much bigger. I check from the back row before the lesson starts. If I can read it from there, every student can.
Teacher 2: I divide my board into three parts. New words on the left. The main lesson in the middle. Examples and notes on the right. I clean each part only when I need to. Students always know where to look.
Teacher 3: I plan what to write before the lesson. Then I write it quickly, step back, and face the class. The board does not need me standing in front of it.
Host: Three small changes. Bigger writing, planned space, and facing the class. The board is the same — but the teaching is much stronger.
Q7. For each strategy, choose the option that best describes where you are now.
Be specific. For example: “Tomorrow I will divide my board into three zones — words on the left, lesson in the middle, examples on the right.”
- The board is a powerful, free, always-available teaching tool — but only if you plan how to use it
- Divide the board into clear zones so students always know where to look for what
- Write big enough for the back row — check by standing there before the lesson
- Step back and face the class often — you cannot teach what you cannot see
- The board is for students too — let them write on it, and use simple drawings to support words
How useful did you find this lesson? Leave a rating and a comment to help other teachers.